HelloWorld!
Welcome to this step-by-step tutorial on building your first flow using Xill4 platform.
Note: This is not an installation guide, if you need guidance with the installation steps, please refer to Installation Guide
This guide will walk you through the process of creating, configuring, and running a simple flow. By the end of this tutorial, you'll have a solid understanding of how to use key components and tools to build functional flows with ease. Let's get started on creating your first project and bringing your ideas to life!
Step 1: Access the Local Server
Open your web browser and navigate to http://localhost:8000. For the best experience, we recommend using either Google Chrome or Microsoft Edge.
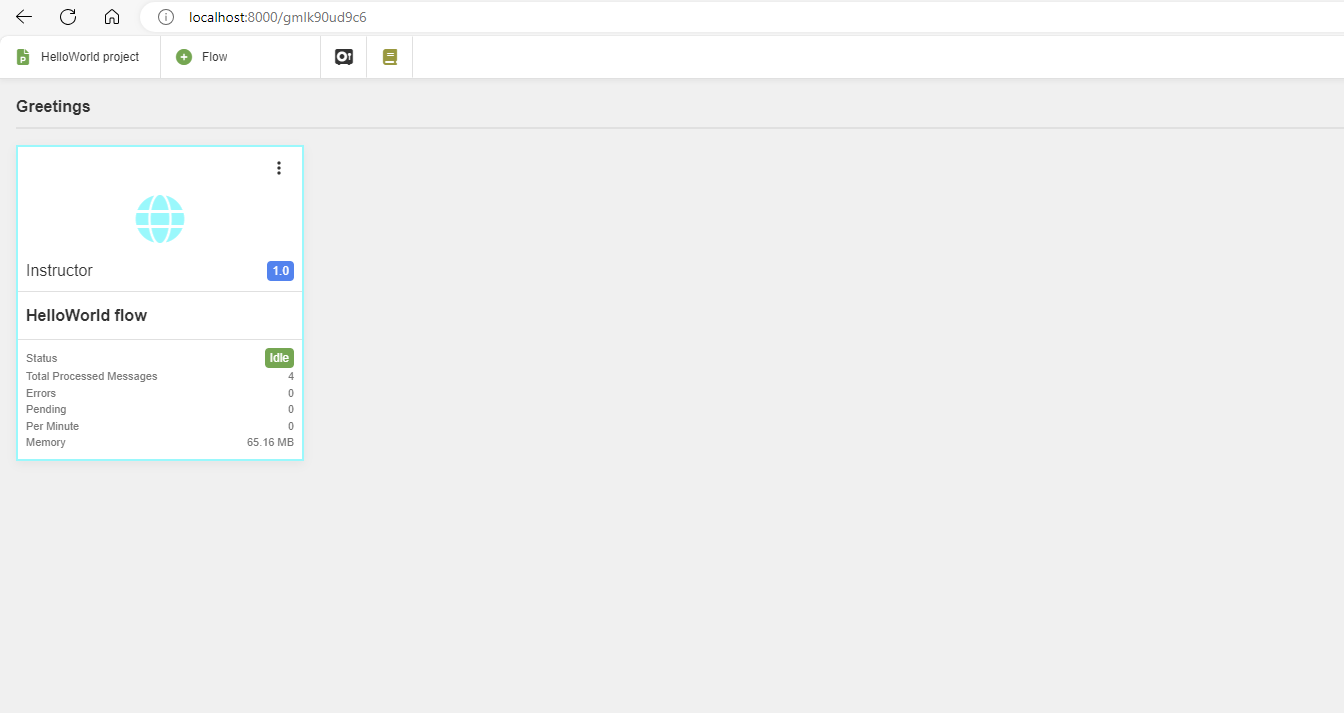
Step 2: Create a New Project
- Click on the Create Project button.
- In the pop-up window that appears, enter your desired project name.
- Click Create Project to confirm.
- You’ll be automatically redirected to the newly created project.
Step 3: Add a New Flow
- Click on + Flow to start creating a new flow.
- In the New Flow window, provide a name for the flow and fill in additional details like group, version, and author.
- Click on Create New Flow.
- The flow will now appear in the project view. Click on the flow to open it in a new tab.
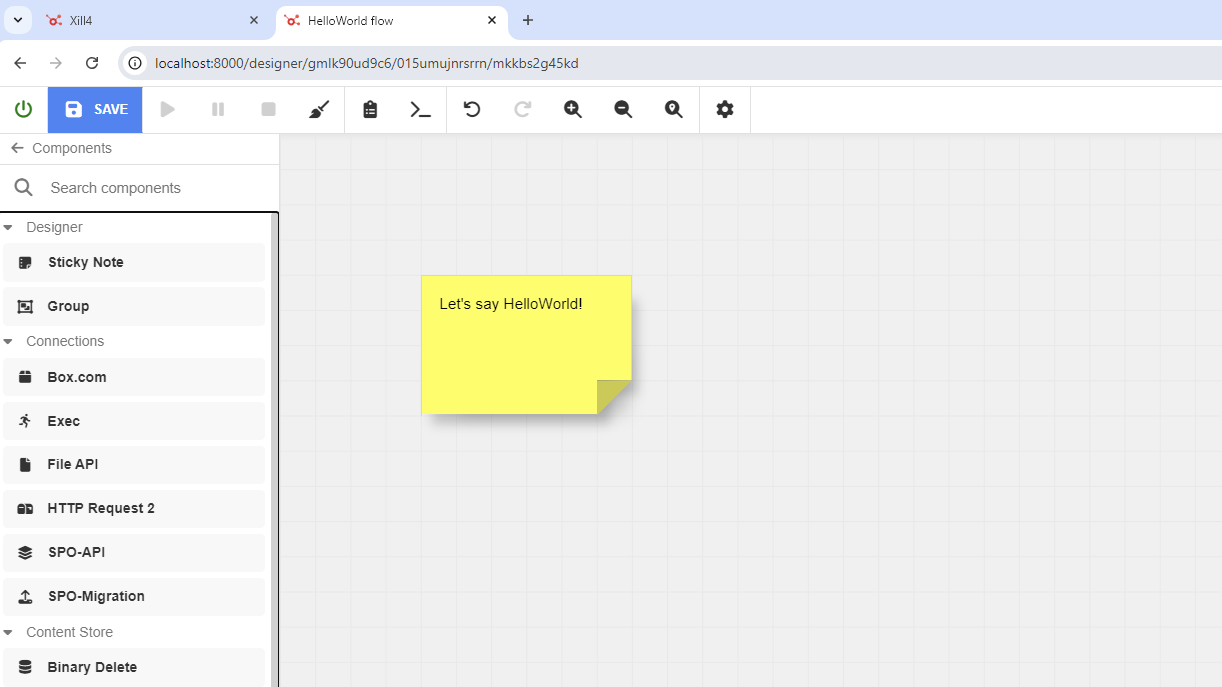
Step 4: Activate the Flow
Turn on the flow by toggling the On/Off switch.
Once activated, the toolbar options will become fully accessible, allowing you to manage and interact with your flow.
Step 5: Add Components to the Flow
- Access Components: The Designer menu on the left sidebar is open by default, providing you with various components for building your flow.
- Drag and Drop: Add components to the canvas by dragging and dropping them from the sidebar.
Note:
- To connect components, draw a line from the output of one component to the input of another.
- To remove the connection, click on the line and press "delete" on your keyboard.
- You can disable and enable the output and input of a component by clicking on the small square on the input and output.
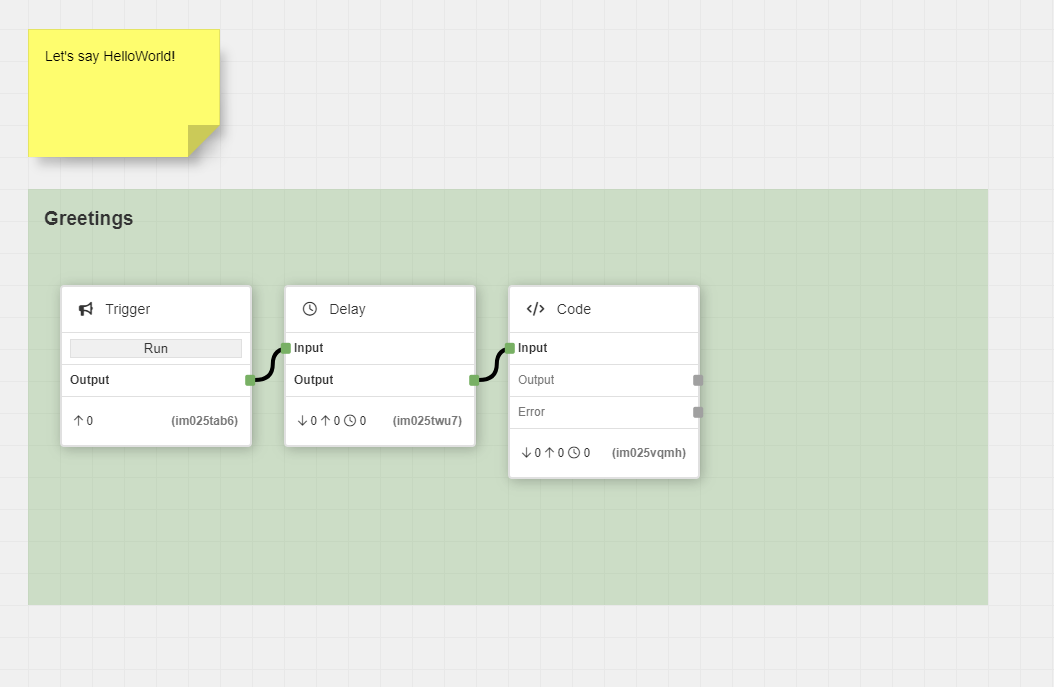
- Add a Trigger: Start by adding a Trigger component, which will initiate the execution of your flow.
- Add a Delay:
- Drag and drop a Delay component onto the canvas. Connect it to the Trigger.
- Double-click the Delay component to configure the delay time. Set it to 5 seconds to observe how the delay works.
- Add a Code Component:
- Drag and drop a Code component and connect it to the Delay component.
- In this component, you can write and execute JavaScript code.
- For this tutorial, define a constant with the value "HelloWorld!".
- Ensure to call the
send()anddone()methods to pass the input to the next component. - Click Apply to save your code.
-
Sticky Note: Use this component to add comments or notes, just like you would in code.
- Group: Organize your flow by grouping related components.
- Add a Print and Logger Component:
-
Connect a Print component and a Logger component to the Code component to display the output.
-
Double-click the Logger component to set a custom message and choose a type (Info, Error, Debug, or Warning).
-
The log message will appear in the Logs console at the bottom of the flow, with different colors based on the chosen type:
- Info: Blue
- Error: Red
- Debug: Black
- Warning: Yellow
-
You can open the console by clicking the
>_button in the top toolbar.
Step 6: Run the Flow
Hit Save and press the Play button in the top toolbar to run your flow.
- The Print component will display "HelloWorld!".
- The log message you specified will appear in the
>_Logs console.
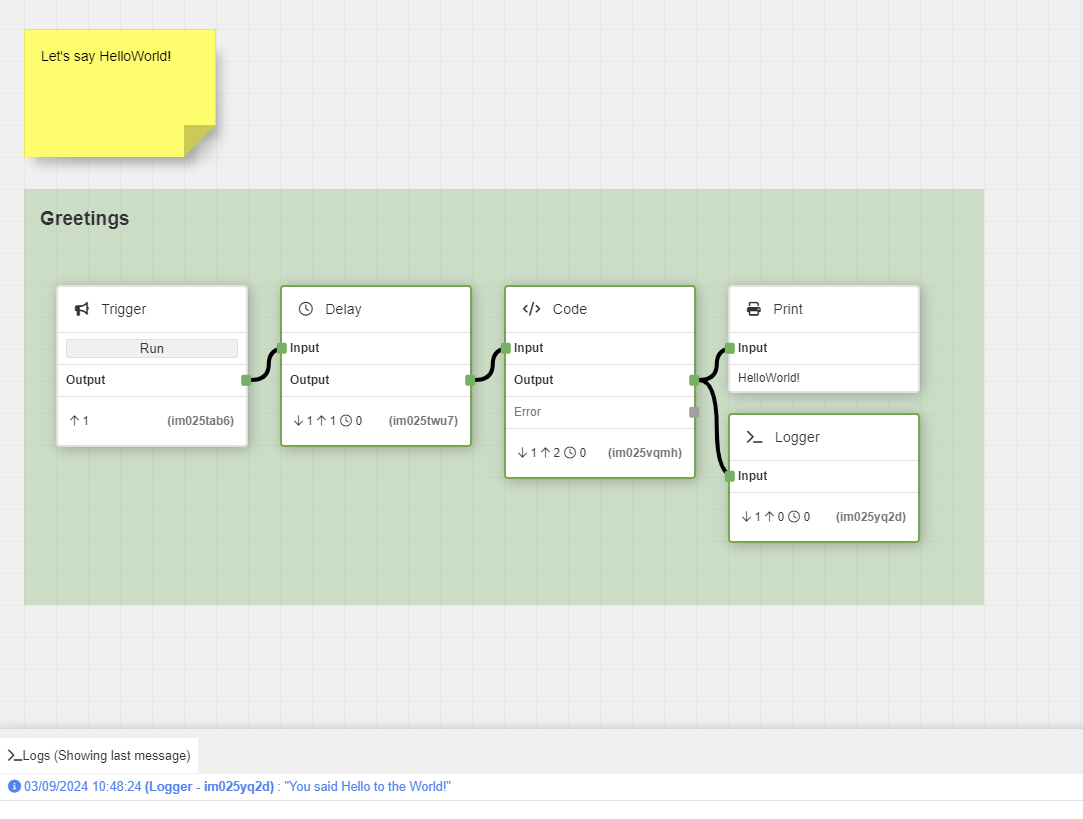
Congratulations! You’ve successfully created and executed your first flow.
Happy flowing!